# webChem
# - User Manual -

# Basics
To enjoy the best possible working experience, you can personalize the user interface.
![]() To display the meaning of each icon, you can hover over it with the mouse pointer.
To display the meaning of each icon, you can hover over it with the mouse pointer.
# General structure of the user interface
After logging in, you will first land on the dashboard.
This serves as a general overview and displays various modules such as users, molecule editor, or assesment to allow quick access. By clicking on "More Modules," you can customize your dashboard by showing additional modules or hiding already activated modules. You can also change the label background color for each label as desired.
On the left side of the browser, there is a toolbar. Using the icons in the toolbar, you can access the main menu ![]() , where all available modules for you are listed, the user profile 1
, where all available modules for you are listed, the user profile 1 ![]() , and the logout
, and the logout ![]()
Furthermore, you can add favorites here, which will be displayed in this toolbar for quick access to the respective modules.
# Adding / removing favorites
"Main Menu" -> "Set Favorites"
- Select the checkbox of the respective module to add a favorite to the toolbar.
- Select an already selected checkbox (colored box) again to remove a favorite.
# User Profile
# User Account: Add/Modify Personal Data
To view your provided data such as first name / last name / abbreviation, select your "User Profile" ![]() from the left toolbar. In the appearing window, you can select "User Account" in the top left and review and modify your information. Additionally, you can add an email address, messenger, phone number, and address where you can be reached. For these activities, the icons
from the left toolbar. In the appearing window, you can select "User Account" in the top left and review and modify your information. Additionally, you can add an email address, messenger, phone number, and address where you can be reached. For these activities, the icons ![]() are available in the lower right half of the window.
are available in the lower right half of the window.
# Personalization of the User Interface
To personalize the user interface, select your "User Profile" ![]() from the left toolbar and click on "Settings."
Under "Personalization," you can edit various aspects of personalization: "Colors," "Styles," and "Language and Time Zone."
from the left toolbar and click on "Settings."
Under "Personalization," you can edit various aspects of personalization: "Colors," "Styles," and "Language and Time Zone."
Select "Reset to Default Settings" to delete all your customizations.
# Colors
In the "Colors" section of the customization, you can set the layout colors of various areas of webChem. Click on the selected area and choose the desired color.
# Styles
In the Styles section, you can enable or disable various properties of the toolbar by clicking on the toggle. If it appears blue, the function is enabled; if it appears gray, the function is disabled. Additionally, you can choose to show or hide tooltips, ratings, feedback, or information for different areas, and select the module that should appear as the homepage upon login.
# Language and Time Zone
Within the "Language and Time Zone" menu item, you can make language and time settings. Additionally, you can change the time format and the unit system by selecting the respective options.
# Security: Changing Login and Password
If you want to change your password, select your "User Profile" ![]() from the left toolbar and click on "Security." In the newly appearing window, you can view your login information and select "Change Password" at the bottom to set a new password. Furthermore, you can activate the Two-Factor Authentication option to enable secure the login to webChem. You will receive a six-digit code per email to confirm your login.
from the left toolbar and click on "Security." In the newly appearing window, you can view your login information and select "Change Password" at the bottom to set a new password. Furthermore, you can activate the Two-Factor Authentication option to enable secure the login to webChem. You will receive a six-digit code per email to confirm your login.
# Modules
A description of the modules integrated into webChem and their operation.
# Tasks
In the "Tasks" module, you can view, manage, or create pending tasks. This module is suitable for team collaboration.
To create a task, click on the ![]() button to add a new task. In the opening window, you can enter a title for the task, as well as a description. Additionally, you can assign a category and priority to the task to classify it as desired. You can also assign or share the task with specific individuals. It is also possible to track the progress of task completion by clicking on the corresponding slider. Select the responsible and assigned users for the task from your list of user groups by clicking on the respective dropdown menus. Save the created task by clicking "Add".
button to add a new task. In the opening window, you can enter a title for the task, as well as a description. Additionally, you can assign a category and priority to the task to classify it as desired. You can also assign or share the task with specific individuals. It is also possible to track the progress of task completion by clicking on the corresponding slider. Select the responsible and assigned users for the task from your list of user groups by clicking on the respective dropdown menus. Save the created task by clicking "Add".
Using the buttons below, you can add the following customizations to tasks:
 Add tags
 Add users
 Add groups
 Add times
 Add images
 Add 2D molecules
 Add 3D molecules
If you want to manage your tasks, go to the "Tasks" module. Here, you will see a list of all tasks. Next to the task you want to work on, you will find the field ![]() "Set as favorite" and "Expand view". By clicking "Expand view", you can manage the task. You can add a note
"Set as favorite" and "Expand view". By clicking "Expand view", you can manage the task. You can add a note ![]() or a comment
or a comment ![]() to this task. Additionally, you can set an alarm
to this task. Additionally, you can set an alarm ![]() by specifying the date and time by which the task should be completed. You can also copy
by specifying the date and time by which the task should be completed. You can also copy ![]() , edit
, edit ![]() , or delete
, or delete ![]() the task.
the task.
# Activities
Here, you will find notifications such as chat messages, tasks, appointments and comments. You have the option to sort notifications by modules or creation times ![]() and select the time period to display
and select the time period to display ![]() . You can also view archived notifications
. You can also view archived notifications ![]() .
.
# Users
In the user section, all associated users with you are displayed. As an "ADMIN," you can view information such as first name, last name, email address, abbreviation, assigned role, personal description, and language.
Furthermore, you can manage, create, or delete users associated with you.
To create a user or user group, select either  "add new user" or
 ![]() "add new user group" from the top bar.
"add new user group" from the top bar.
After selecting "add new user", a window will open where you can enter user information such as first name, last name, and email address (optional). If you leave the "User Account / Email" field blank, a user account will be assigned automatically by the system.
When adding a new user, it is important to select the correct role for the new user. While other instructors may receive the "ADMIN" role, it is recommended to assign the "Student" role to learners. The corresponding modules that users can access are already preconfigured for these roles. For example, the predefined section ![]() "Student" combines all the modules that learners need to work effectively with webChem. However, modules can be manually removed or additional modules can be added below.
"Student" combines all the modules that learners need to work effectively with webChem. However, modules can be manually removed or additional modules can be added below.
You also need to assign a password for the user to be able to log in.
Attention! This password should be changed by the user after their initial login.
To add the user to an existing group, select the "Groups" section and choose from the list that appears.
# Adding a New User Group
You can create a user group with any number of users by selecting "add new user group". To create the group, you must provide a title and a short. Optionally, you can provide a description to provide additional information to group members.
In the "User List" section, you have the options: ![]() "Add user",
"Add user", ![]() "Add multiple users",
"Add multiple users", ![]() "Add existing users", and
"Add existing users", and  "Exclude me from the group".
In the "Add multiple users" section, you can add a desired number of group members at once. First, select the desired number and then provide a user account template, e.g., Class6a. The system will automatically create the desired number of user accounts, e.g., Class6a1, Class6a2, Class6a3. You can create the same password for all group members by entering the desired password in the provided field. If you want separate passwords for each group member, select
"Exclude me from the group".
In the "Add multiple users" section, you can add a desired number of group members at once. First, select the desired number and then provide a user account template, e.g., Class6a. The system will automatically create the desired number of user accounts, e.g., Class6a1, Class6a2, Class6a3. You can create the same password for all group members by entering the desired password in the provided field. If you want separate passwords for each group member, select ![]() "Generate password," and the system will automatically generate different passwords for each group member.
Finally, you can either add individual modules from the module list by clicking or select a predefined collection of modules for the users under
"Generate password," and the system will automatically generate different passwords for each group member.
Finally, you can either add individual modules from the module list by clicking or select a predefined collection of modules for the users under ![]() .
Before adding the group, you can select "Print view" under
.
Before adding the group, you can select "Print view" under ![]() .
Here, the login information (user account and password) for the created group members is listed, and it can be exported as a text or CSV file.
.
Here, the login information (user account and password) for the created group members is listed, and it can be exported as a text or CSV file.
# Adding existing users to a new user group
You can add existing users to a newly created user group. To do this, select ![]() and then choose the already created users.
and then choose the already created users.
# Excluding myself from a user group
If you want to create a user group in which you are not included, select ![]() . You will then create the user group but will not be part of it and will not be automatically informed about projects related to this group, for example.
. You will then create the user group but will not be part of it and will not be automatically informed about projects related to this group, for example.
# Chat
To communicate with people through webChem, you can use the chat function. You can either access the chat through the start menu or by selecting the speech bubble icon ![]() in the left menu bar.
in the left menu bar.
You can open a chat room by selecting the ![]() symbol. You have the option to choose between a direct message, a work chat, a project chat, or a private chat. If you want to contact multiple users at the same time, select the option of a work, project, or private chat. You can add a title and a description to your chat room.
By clicking on the Contacts section, you can select a desired contact from a list and send them a direct message.
symbol. You have the option to choose between a direct message, a work chat, a project chat, or a private chat. If you want to contact multiple users at the same time, select the option of a work, project, or private chat. You can add a title and a description to your chat room.
By clicking on the Contacts section, you can select a desired contact from a list and send them a direct message.
If you want to open or delete an existing chat room, either select the desired room or choose ![]() to delete it.
to delete it.
You can send an attachment by selecting ![]() .You can send an image, a 2D molecule, a 3D molecule, or formatted text as an attachment.
.You can send an image, a 2D molecule, a 3D molecule, or formatted text as an attachment.
In the Settings section, you can choose how many chat rooms are displayed side by side at the same time.
# Molecule Editor
# General functionalities
To open the molecule editor, go to the Modules section and select Molecule Editor.
To draw a bond or molecule, click and hold the left mouse button. Now drag the cursor in a direction to draw a bond.
To delete an element, right-click the desired object with the mouse. Another way to delete elements is to select the ![]() erase icon in the menu bar and then tap on the desired elements. If you want to delete multiple elements at once, first select the lasso
erase icon in the menu bar and then tap on the desired elements. If you want to delete multiple elements at once, first select the lasso ![]() , circle the desired area, and proceed as described before.
You can center your drawn molecule at any time by selecting
, circle the desired area, and proceed as described before.
You can center your drawn molecule at any time by selecting ![]() in the right menu bar.
in the right menu bar.
To zoom in or zoom out on the drawing, select either the zoom out ![]() or zoom in
or zoom in ![]() icons in the right menu bar.
icons in the right menu bar.
Using the ![]() move icon, you can edit the bond lengths/angles of your 2D structure. Select the symbol in the left menu item for that.
move icon, you can edit the bond lengths/angles of your 2D structure. Select the symbol in the left menu item for that.
To rename a created molecule structure, double-click on the tab label in the upper working area of the workspace, for example, "2D Structure" or "2D Structure (3D)".
To add another text, 2D structure, 3D structure, or diagram, select ![]() .
.
If you want to highlight a created structure, you can select it under ![]() .
.
By selecting ![]() , you can delete the workspace along with the created content.
, you can delete the workspace along with the created content.
# Creating a 2D molecule structure
When you open the molecule editor, a workspace will appear where you can create a 2D molecule structure.
You create these by either manually connecting ![]() elements, inserting a chain of atoms
elements, inserting a chain of atoms ![]() , or adding a molecule fragment
, or adding a molecule fragment ![]() . To select any element, click on
. To select any element, click on ![]() elements. Now you can choose an element from the periodic table.
elements. Now you can choose an element from the periodic table.
If you want to replace an existing element with another, such as in a molecule fragment, first select the desired element from the periodic table. Then click on the location in your drawing where the chemical element should be replaced.
You can add different atomic symbols to the molecule using the ![]() function.
function.
Existing hydrogen atoms are not displayed. If you want to add hydrogen atoms to the drawing, you can do so by activating the menu item ![]() .
.
If you want to represent a reaction, select ![]() to draw a desired reaction arrow. You can add text to your drawing using the
to draw a desired reaction arrow. You can add text to your drawing using the ![]() label function. Enter your desired text in the appearing field and click Add. Now, when you left-click in the workspace, your text will appear at that location.
label function. Enter your desired text in the appearing field and click Add. Now, when you left-click in the workspace, your text will appear at that location.
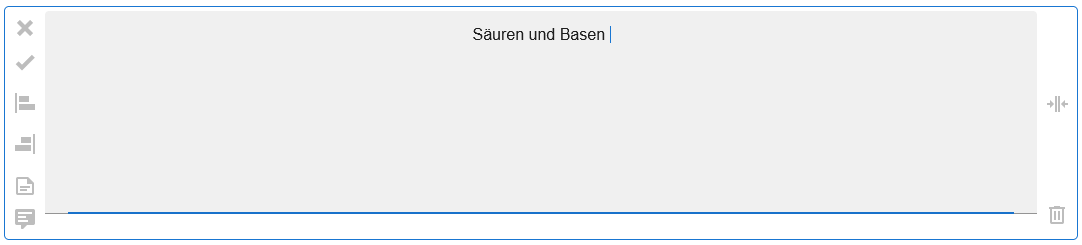
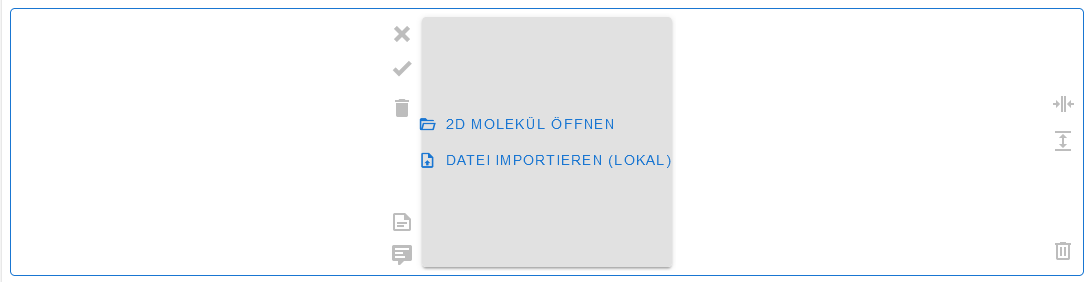
You can import a 2D structure by selecting ![]() and then choosing between the options "Open Molecule" or "Upload File".
and then choosing between the options "Open Molecule" or "Upload File".
To export a 2D molecule that you created, you can use the ![]() option. You have various options to choose from: "Save Molecule", "Export File", "Copy to Clipboard", "Create SMILES", "Create InChI", or export as "SDF File (a file for storing spatial data)".
option. You have various options to choose from: "Save Molecule", "Export File", "Copy to Clipboard", "Create SMILES", "Create InChI", or export as "SDF File (a file for storing spatial data)".
When you select the ![]() icon, you can save your created 2D molecule structure as an image.
icon, you can save your created 2D molecule structure as an image.
You can obtain molecule information such as molecular formula and molecular mass from the Info ![]() section in the lower part of the right toolbar.
section in the lower part of the right toolbar.
# Converting a 2D to a 3D molecule structure
If you want to convert a 2D structure to a 3D structure, select the ![]() convert to 3D option. This may take a moment. Once the conversion is complete, a new tab will appear in the workspace with the illustration of your desired 3D structure.
convert to 3D option. This may take a moment. Once the conversion is complete, a new tab will appear in the workspace with the illustration of your desired 3D structure.
*Attention: If you make changes to your 2D molecule structure, you must create a new 3D structure afterward. Changes to the 2D structure are not automatically transferred to the 3D molecule structure.
# Functions of the 3D molecule
After creating a 3D molecule, you have various options to interact with it.
You can rotate the molecule itself by holding down the left mouse button. Another option is to enable automatic rotation of the molecule itself. Right-click on the workspace and select "Start Rotation" for this purpose.
You can interact with elements within your 3D molecule by selecting the menu item ![]() and then clicking on the desired elements. You can then, for example, move them using the
and then clicking on the desired elements. You can then, for example, move them using the ![]() rotate option.
rotate option.
Additional functions are available through a right-click in the workspace:
- Show atomic number
- Show elements
- Hide bond lengths
- Show charges
- Start rotation
- Add hydrogen
You can display your 3D molecule in different options by selecting ![]() from the right toolbar.
from the right toolbar.
# Quantum mechanical calculations on the 3D molecule
Through the menu item ![]() in the right toolbar, you can perform quantum mechanical calculations on the molecule.
in the right toolbar, you can perform quantum mechanical calculations on the molecule.
You can:
- Optimize the molecule's geometry
- Calculate the conformation
- Calculate the UV spectrum of the molecule
- Calculate the IR spectrum of the molecule
- Calculate the rotational potential of the molecule
- Calculate pKa values of individual elements.
Attention! To calculate the pKa value, you must first select an element of the molecule!
The quantum mechanical calculations are displayed in a chart, which you can view using the ![]() option in the right toolbar. You have the options to "Export the chart", "Insert into a session", "Show a data table", "Save the chart as an image", or "Copy it to the clipboard".
option in the right toolbar. You have the options to "Export the chart", "Insert into a session", "Show a data table", "Save the chart as an image", or "Copy it to the clipboard".
# Creating a 3D molecule from a database
You have the option to work with an existing 3D molecule or perform calculations on it.
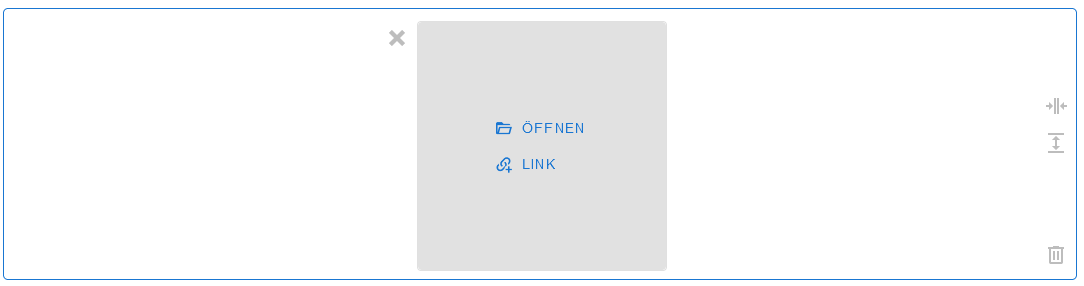
Open the molecule editor and add a 3D structure by using ![]() . A new workspace will open, offering you the possibility to:
. A new workspace will open, offering you the possibility to:
- Open a previously created molecule
- Import a molecule
- Import a molecule via SMILES
- Insert a molecule from the database
- Create a molecule by entering its raw data/coordinates.
# Molecules
Here you will find an overview of all molecules you have created or shared. You can also search for molecules by entering the assigned name in the search bar. Additionally, you can add selected molecules to your favorites.
Furthermore, you can easily manage your molecules by selecting a molecule. You can rename the molecule or add/delete a description by double-clicking on the name/description. Below the name, you will find the symbol ![]() . By selecting this symbol, you can access the functions of the molecule editor.
. By selecting this symbol, you can access the functions of the molecule editor.
At the bottom of the workspace, you will find quick action shortcuts that allow you to:
![]() Add tags
Add tags
![]() Add categories
Add categories
![]() Add users
Add users
![]() Add groups
Add groups
You may also see the creation timeframe. Additionally, information about a shared molecule is displayed (creation date, author, collaborators).
You can attach a ![]() note or a
note or a ![]() comment. The options to
comment. The options to ![]() copy,
copy, ![]() archive, or
archive, or ![]() delete are also available.
delete are also available.
You can interact with this module using the right toolbar, for example, to close the displayed molecule.
# Notes
In this module, you can create, view, and manage notes.
# Calendar
This module provides an overview of your personal and shared events and tasks. You can select whether to display "All," "My," or "Shared" events at the top right corner of the browser. You can also adjust various display options at the top left corner of the website.
List: This view provides an overview of your events for the current month. You can switch the view between day/week/month using the buttons at the top right. Additionally, you can use specific filters to show or hide events.
Blocks: Past, current, and upcoming events are displayed as a list.
Calendar: Events are displayed in a calendar format with corresponding times. You can choose between "Days" and "Months" as the display option.
To add an event, click on the respective time slot in the calendar or use the ![]() option in the right sidebar.
option in the right sidebar.
# Assesment Editor
The Knowledge Editor allows you to create your learning environments consisting of knowledge elements.
Under the ![]() section, you have the options to create a new learning environment and open an existing one. You can also save, export, or import an environment from a local drive.
section, you have the options to create a new learning environment and open an existing one. You can also save, export, or import an environment from a local drive.
You can add a new page to the active learning environment using ![]() . To rename an existing page, double-click on its current name. To delete a page, click on the X next to the page name. If there are multiple pages, you can duplicate a page and move it forward or backward by right-clicking the page name with a PC mouse.
. To rename an existing page, double-click on its current name. To delete a page, click on the X next to the page name. If there are multiple pages, you can duplicate a page and move it forward or backward by right-clicking the page name with a PC mouse.
# Designing the Learning Environment
The learning environment consists of individual knowledge elements that can be used for both assessing and teaching learners, and they can be combined flexibly.
You can add different question types to the learning environment.
To create a question, select the corresponding symbol from the left menu. The following question types are available:
 Text question
 Multiple-choice question
 Slider question
 Ratings
 Matrix
 Molecule task (Clicking the "Molecule Editor" button takes respondents to the molecule editor.)
When you select a question type, a window appears where you can enter the question text. You can format the question text according to your preferences using the symbols above the text editor.
Additionally, you can make various display and editing settings, which can be found below the question text.
For example, you can assign a point value between one and ten to each question, indicating the score for answering the question correctly.
You can also specify whether the question is mandatory ![]() . Learners can only proceed to other questions or move to a new page after completing mandatory questions. If this option is disabled, the question is optional to answer.
. Learners can only proceed to other questions or move to a new page after completing mandatory questions. If this option is disabled, the question is optional to answer.
To save the created question, select  . Once added to the learning environment, the question will be visible in the desired format. Clicking on the question allows you to edit it again. To delete a question, select it and click on the
  icon at the bottom right of the question field.
If you have multiple questions on a page, you can change the position of the question easily through drag and drop. Alternatively, use the arrows in the top right of the open question field. You also have the option to apply the settings made to one question to other questions. Select  "Save as Default" for that.
In addition to designing various question types, you can also add text, images, or molecules to the learning environment. webChem provides the following options, which you can find at the bottom left of the workspace:
![]() Text
Text
 Formatted Text

- Image
- 2D Structure
- 3D Structure

# Assement Elements
To view and manage your saved knowledge elements, select the corresponding module.
After opening the module, you will find a list of saved elements. To change the title and description of each element, select ![]() . You can also add tags and users to share the element or select a group to add the element to.
. You can also add tags and users to share the element or select a group to add the element to.
The content of the element appears in a window next to the list.
Right at the top right of this window is the EDITOR button, which allows you to edit the element in the Knowledge Editor.
# Assesment Manager
Using the Knowledge Manager, you have the ability to manage your learning environments, make them available to teachers, and then evaluate them.
# General Conditions of the Manager
After opening the module, you will find a list of your created or shared learning environments. You also have the option to search for learning environments ![]() or create a new one
or create a new one  . Furthermore, you can filter the list based on specific criteria
 ![]() or sort it
or sort it ![]() . You can also choose to display only the learning environments that have been shared with specific groups
. You can also choose to display only the learning environments that have been shared with specific groups  or users
 ![]() . Select the corresponding symbol for this purpose.
. Select the corresponding symbol for this purpose.
# Management of Learning Environments
When you select a learning environment, a window opens to the right of the list where you can view all the information about it.
You have the option to test the learning environment by selecting ![]() . Furthermore, you can edit it using the -EDITOR ICON-. If you want to give the learning environment to the learners for them to edit, select the PARTICIPANT ICON. Search for the participants and then select the RELEASE ICON. This learning environment will then appear for all added participants in the "Knowledge" module.
You can also recognize whether you have shared a learning environment by the following status symbols displayed in front of the respective names of the participants:
. Furthermore, you can edit it using the -EDITOR ICON-. If you want to give the learning environment to the learners for them to edit, select the PARTICIPANT ICON. Search for the participants and then select the RELEASE ICON. This learning environment will then appear for all added participants in the "Knowledge" module.
You can also recognize whether you have shared a learning environment by the following status symbols displayed in front of the respective names of the participants:
![]() prepared (the learning environment does not appear to the participants)
prepared (the learning environment does not appear to the participants)
![]() released (the learning environment appears to the participants)
released (the learning environment appears to the participants)
Once the participants have edited the learning environment, the "Updated" section will display the date/time of the editing, and the "Answers" section will show the number of solved tasks. Additionally, under "Actions," you will now find the option to rate it ![]() .
.
# Setting the Editing Period
You have the option to specify when the students can edit the learning environment. Using the selection of symbols ![]() , you can set the start and end time for editing (date/time).
, you can set the start and end time for editing (date/time).
# Evaluating Knowledge Levels
To evaluate a knowledge level/learning environment, select the icon ![]() under Actions.
under Actions.
A window will appear giving you an overview of the questions to be evaluated.
By selecting the appropriate fields, you can view the correct and incorrect answers, as well as unanswered questions, text questions, and molecules.
You have the option to comment on the questions to provide direct feedback to the students. Select the question and write a text in the "Note" section.
For "Text Questions" and "Molecules," you also have the option of assigning individual points.
webChem automatically generates a percentage rating with a pie chart. After analyzing the questions, you can also provide an individual evaluation. Use the free-form field for evaluation. For example, you can manually rate the knowledge level with a grade from 1.0 to 6.0.
By clicking "Save," the evaluation will be displayed to the students. In the overview of the learning environment in the Knowledge Manager, the students' evaluation will appear, and the symbol ![]() will be shown under "Actions."
will be shown under "Actions."
# Assesment
The learners have access to the shared learning environments through the "Knowledge" module. As a teacher, this module is relevant to you if your fellow teachers release knowledge assessments for you to work on.